Microphones are just like any other instrument: The same musician playing the same part through a different make or model is going to sound different.
The beautiful part of recording is that there are so many different sonic choices for so many applications. So how do you know which mic is the right one for the job? How do you even tell them apart?
Sometimes, people refer to a mic as a "kick mic" or a "vocal mic," but while some mics may have a frequency response that makes a guitar or hi-hat sound particularly great, any microphone can be used to capture any sound. Experimentation is more than half the fun.
Having said that, there are a few things that make some microphones better for certain jobs than others.
Polar Patterns
Some microphones pick up sound all around them, while others only pick up sound directly in front of them and reject sound behind them. What we’re talking about here are referred to as polar patterns (or pickup patterns), and you can understand each by imagining some basic shapes.

Cardioid

Omnidirectional

Figure-8
Cardioid is one of the most common pickup patterns and works great for most applications. Mics with a cardioid pickup pattern capture sound in front of the capsule and offer great rejection in the rear. The pickup pattern somewhat resembles a heart, which is where it gets its name.
Omnidirectional microphones pick up sound equally from all directions: in front, behind, and from the sides. This works best when you want to capture room ambience.
Figure-8 mics—sometimes called bi-directional—pick up sound equally in front and behind but have great rejection on the sides. Most ribbon mics are built with a figure-8 pickup pattern. It’s often a selectable pickup pattern on condenser mics, too, and is regularly used in several stereo recording techniques.
While these cover the basics, you can find more information and learn about less-common polar patterns here.
Types of Microphones
In addition to the various polar patterns, there are three basic types of microphones, each with its own unique sonic characteristics.
Dynamic microphones—sometimes called moving-coil mics—are the simplest mic design. Dynamic mics are very durable and can handle high volumes without clipping. Their default pickup pattern is cardioid, which provides excellent rejection when using stage monitors during a live show or recording in small spaces.
Need help choosing? Check out our dynamic mic buying guide.

Condenser mics capture much more detail than dynamic mics. They get higher highs and lower lows, but they’re more fragile and can’t handle very loud noises without clipping.
Most condenser mics also come with selectable pickup patterns, allowing you to use the best pattern for the job. However, all of these bells and whistles require a little extra juice—48 volts to be exact. Condenser mics require external power, usually provided by the console or interface using the phantom power button.
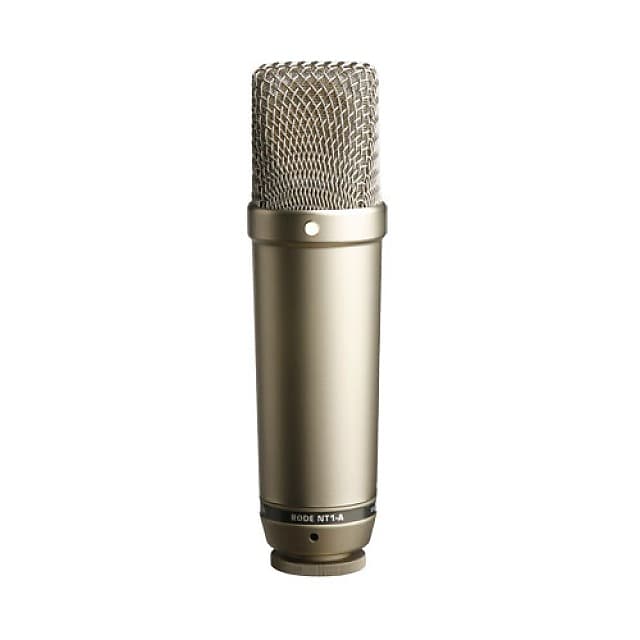
Condenser mics come in two basic sizes: large diaphragm and small diaphragm.
Large diaphragm condensers (LDCs) are typically side-address, meaning you speak into the side of the grill rather than the top of the mic, like with a dynamic mic.
Because LDCs have a bigger capsule, they can capture more low-end than small diaphragm condensers and respond more aggressively to the proximity effect (explained more below).
They tend to have more self-noise—meaning they’re more likely to capture a hiss—but they also tend to have more of a distinct vibe than their small diaphragm counterparts.
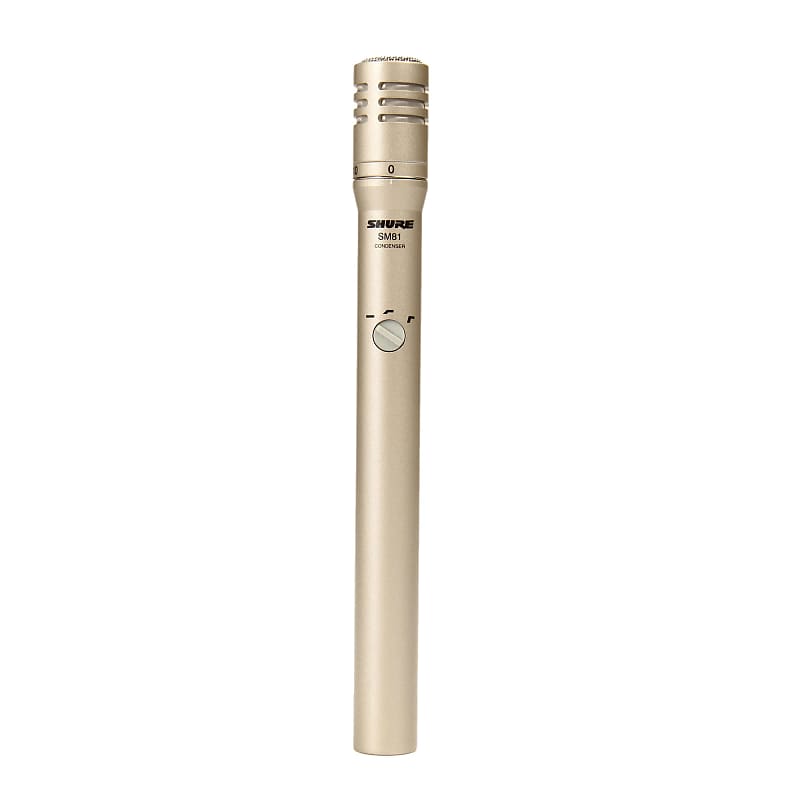
Small diaphragm condensers (SDCs), on the other hand, are front address microphones, meaning you point the top of them directly at the sound source. They tend to be more accurate and less vibey than LDCs, with better transient response. They tend to produce more neutral and natural-sounding recordings.
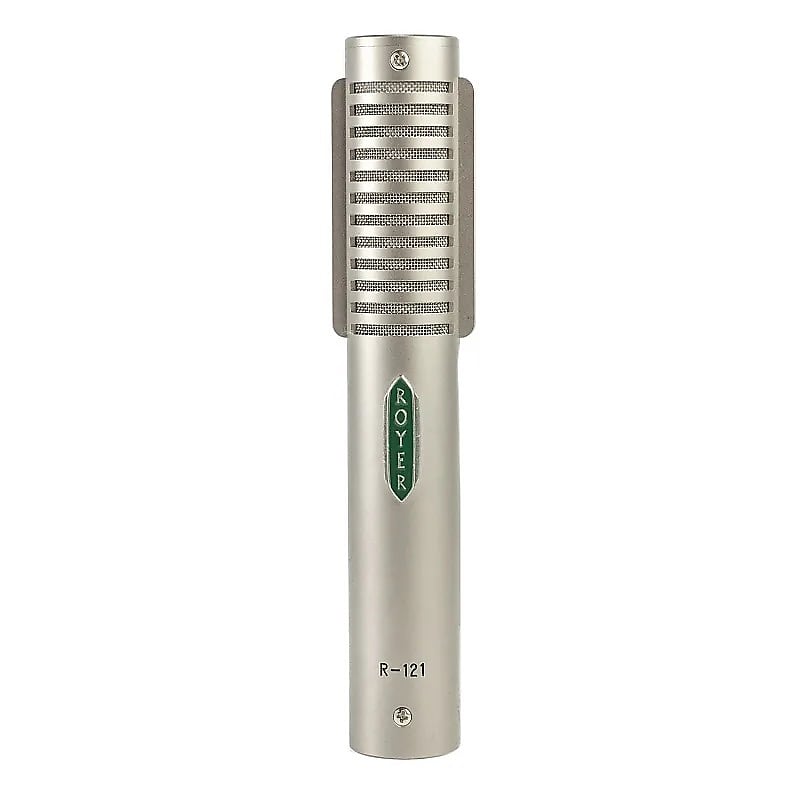
Ribbon mics are often considered to be a vintage variety, but there are many companies making great ribbon mics today. They can bring a rich character to everything, from vocal mics to drum overheads to guitar amps.
They were the first style of microphone created and are synonymous with the sound of early recordings. They’re also more fragile than dynamic mics and can be badly damaged if not handled with proper care. High-sound pressure levels can permanently damage a ribbon mic, so be extra careful when using one.
Ribbon mics usually use a figure-8 pickup pattern and have a warm sound, with less high-end than other mic types. By using the figure-8 placement intelligently, you can capture multiple instruments at once without bleed. One thing to note: Ribbon mics are even less sensitive than dynamic mics and require a ton of gain from your preamp to properly gain stage.
Need help choosing? Check out our ribbon mic buying guide.
Microphone Fundamentals
Now that you know the different types of mics and pickup patterns, you’re ready to start recording.
Overall, it’s pretty simple. Point the mic at the instrument you want to capture, and hit record. But first, here are a few simple tips to help improve any recording.
On/Off Axis
When pointing a microphone at a sound source, you’ve got two options: point the mic directly at the instrument (on-axis), or don’t point it directly at the instrument (off-axis).
On-axis recordings will sound brighter, and more up-close to the listener. If you’re using a cardioid mic, you likely won’t hear much room ambience at all.
Off-axis recordings tend to sound darker and more diffused and include more room ambience. Try both, and decide for yourself which sounds better in a given situation.
Proximity Effect

Rode NT1-KIT with Shock Mount and Pop Filter
The proximity effect is simple: The closer the microphone gets to the sound source, the more exaggerated the low frequencies become.
Placing a mic too close to an instrument can cause unwanted boominess, but you can use this to your advantage, too, by adding some beefy low-end to tracks that need a little extra oomph.
Shock Mount or Pop Filter
Whenever possible, make sure to use a shock mount and a pop filter when recording vocals.
The shock mount helps prevent the microphone from vibrating on the stand and adding sympathetic frequencies to the recording. Shock mounts are almost always used for large diaphragm condensers.
The pop filter is used to reduce plosives, or popping noises caused by puffs of air when making P and B sounds.
Basic Stereo Mic’ing Techniques
You may find that you simply can’t capture the sound you want with a single microphone. That’s where stereo mic’ing techniques come in.
Stereo mic’ing requires two microphones, preferably of the same make and model. It adds a great sense of depth and space to a recording and can even broaden the frequency range you capture. However, stereo mic’ing is much more complicated than mono mic’ing, which means it requires a little more know-how.
Spaced Pair Method
The spaced pair method is by far the simplest technique for stereo recording, especially if you want a super wide stereo image.
For this technique, set your mics to cardioid or omni and point them at the sound source, either on- or off-axis. Make sure both mics are at the same angle, height, and distance from the instrument, and roughly three to ten feet apart. And there you have it.
When using this method, make sure you’re following a principle known as the 3:1 rule.
3:1 Rule
Okay, so phase is actually a pretty complicated scientific principle that has to do with how waveforms travel, but for all intents and purposes, you can think of phase as the time relationship between two microphones.
If you use two microphones to record the same sound source, they need to hear that sound at exactly the same time, otherwise your recording might sound a bit underwater or—for the guitarists reading this—like it was run through a phaser pedal.
You can avoid these phasing issues using the relatively simple 3:1 rule. When using two mics, place the second mic three times the distance from the first mic as the first mic is from the sound source.
So if you’re using two mics to record an acoustic guitar and the first mic is roughly one foot away from the guitar, the second mic should also be one foot away from the guitar, and roughly three feet from the first mic.
This rule is most commonly applied when using what’s called the "spaced pair method," but it's just a good guideline to follow in general.
X/Y
For X/Y stereo mic’ing, you'll need two cardioid microphones. Place the capsules at exactly the same distance from the sound source, with one mic pointing left and the other pointing right to create an angle between 90º and 135º.
Because the capsules are the same distance from the instrument, there should be no timing or phase issues if done correctly.
X/Y is a great quick-and-easy stereo mic'ing technique that works well in tight spaces, but unfortunately, it doesn't offer a very wide stereo image.
OTRF
ORTF stands for Office de Radiodiffusion Télévision Française and is used to simulate the stereo image captured by the human ears.
Start by setting your mics to cardioid and placing the capsules roughly seven inches apart. Then rotate the mics outward to create, roughly, a 110° angle.
Be extra careful checking phase with this technique. If done correctly, it should simulate what you heard standing in that position.
Mid-Side
The mid-side technique is definitely one of the more advanced methods of stereo recording, but it provides a unique tone that accentuates volume differences in a recording and captures a great blend of direct and indirect sounds.
When using the mid-side technique, it’s common to start with a large diaphragm condenser mic set to figure-8, with the sides pointing toward the instrument. In that position, it rejects the direct sound coming from the instrument and captures the indirect sounds bouncing off the walls.
Next, add a second mic of your choosing (most commonly a cardioid SDC is used, although omni will also work) directly above the LDC, pointed toward the sound source. Try to get it as close as possible to the LDC.
What is Mid-Side Processing and How To Use It | Recording Tricks
Finally, you’ll need to do a little extra work in your DAW to pull this off. Create three tracks in your DAW: one for the LDC, one for the SDC, and a duplicate of the LDC with the phase reversed.
To achieve this, simply use the same input for tracks 1 and 3. Stick an EQ with a phase reverse button on track 3, with the phase reverse engaged. Pan tracks 1 and 3 to the left and right, respectively, and keep the SDC straight in the center with no panning. There you have it: mid-side recording.
This technique provides great stereo room ambience while maintaining a clear center image of the instrument, which makes it an excellent choice for singer-songwriters.
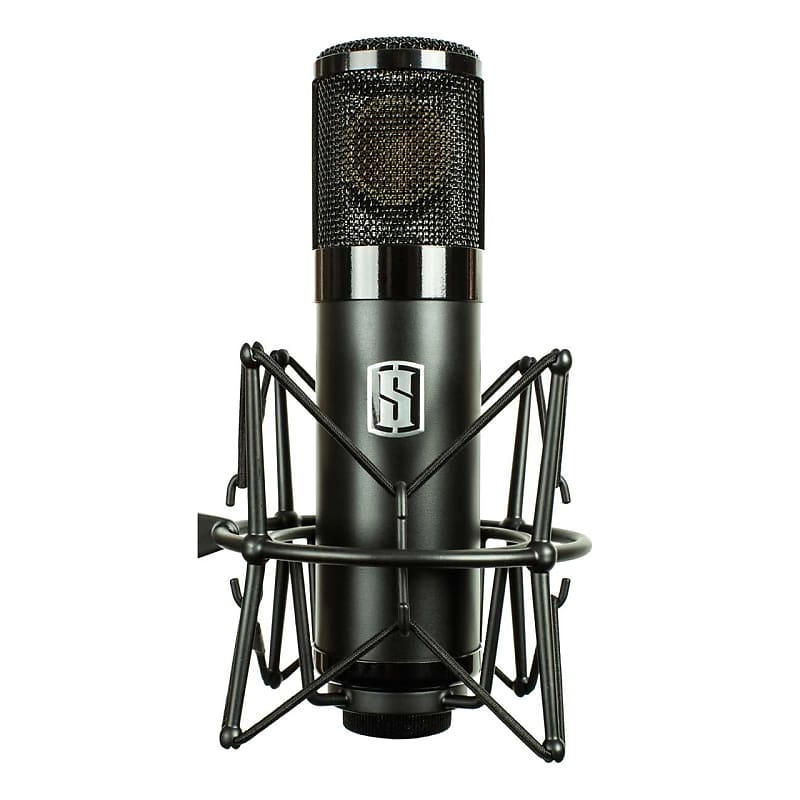
Modeling Mics: A New High-Tech Option
Engineers and producers today have a new option for recording: modeling mics. Unlike traditional dynamic, condenser, or ribbon mics, modeling microphones lets you use software to emulate the sound and character of a variety of classic mics, and often mic placements, polarity, and preamp combinations as well.
Slate's ML-1 condenser mic, when used with its associated software, offers Neumann U 47, U 67, AKG C12, and other high-end vintage tube mic tones, as well as the Neve 1073 and Telefunken V76 preamp sounds.
Meanwhile, the Townsend Labs Sphere L22 and its software offer 20 mics, from classic tube mics to ribbons and dynamic mics too. Antelope Audio is also a leading company in this new world and offers many mics that offer numerous emulations, when paired with Antelope's interfaces.
Practice Makes Perfect
You've got all the tools you need to make a great recording, but it's not going to come easy.
You need to move mics around. You need to listen. You need to practice this craft just as much as you practice your instrument.
Editor's Note: Check out every installment in Brad Pack's series on home recording.
- Home Recording Basics I: Setting Up Your Studio with Monitors and Acoustic Treatment
- Home Recording Basics II: Choosing Your First Audio Interface and DAW
- Home Recording Basics III: A Guide to Microphone Types and Placement
- Home Recording Basics IV: How to Record Acoustic Guitar and Vocals
- Home Recording Basics V: Mic'ing a Drum Kit From Start to Finish
- Home Recording Basics VI: How to Mic Your Electric Guitar
- Home Recording Basics Part VII: Recording Vocals in Your Bedroom
- Home Recording Basics Part VIII: Basics of MIDI and MIDI Controllers
- Home Recording Basics Part IX: How to Prep Your Tracks for Mixing
- Home Recording Basics Part X: Equalization
- Home Recording Basics Part XI: Compression and Dynamics Processing
Learn more about how to record music at home on our Basics of Home Recording homepage.